

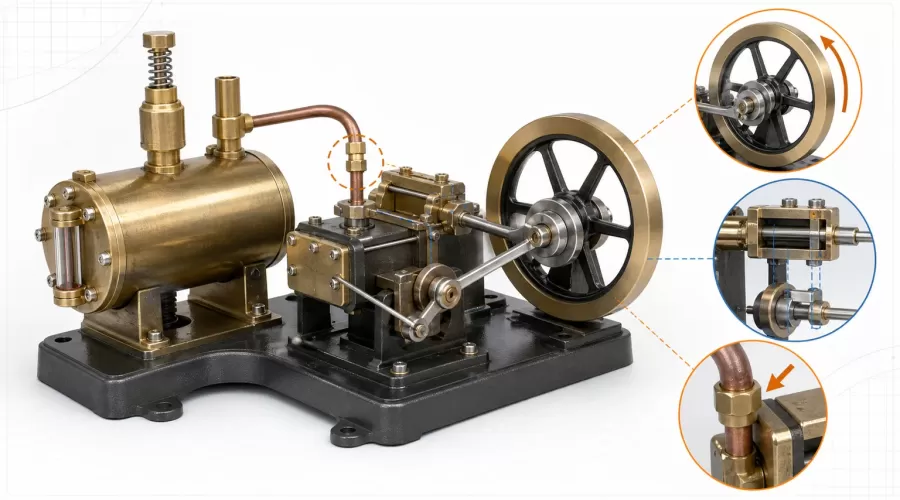
Updated July 22, 2026. When a model steam engine will not run, the safest useful question is not “How much more steam does it need?” It is “Does the mechanism turn freely when it is cold and fully depressurized?” That single split separates many mechanical faults from steam-path, valve-timing and sealing faults.
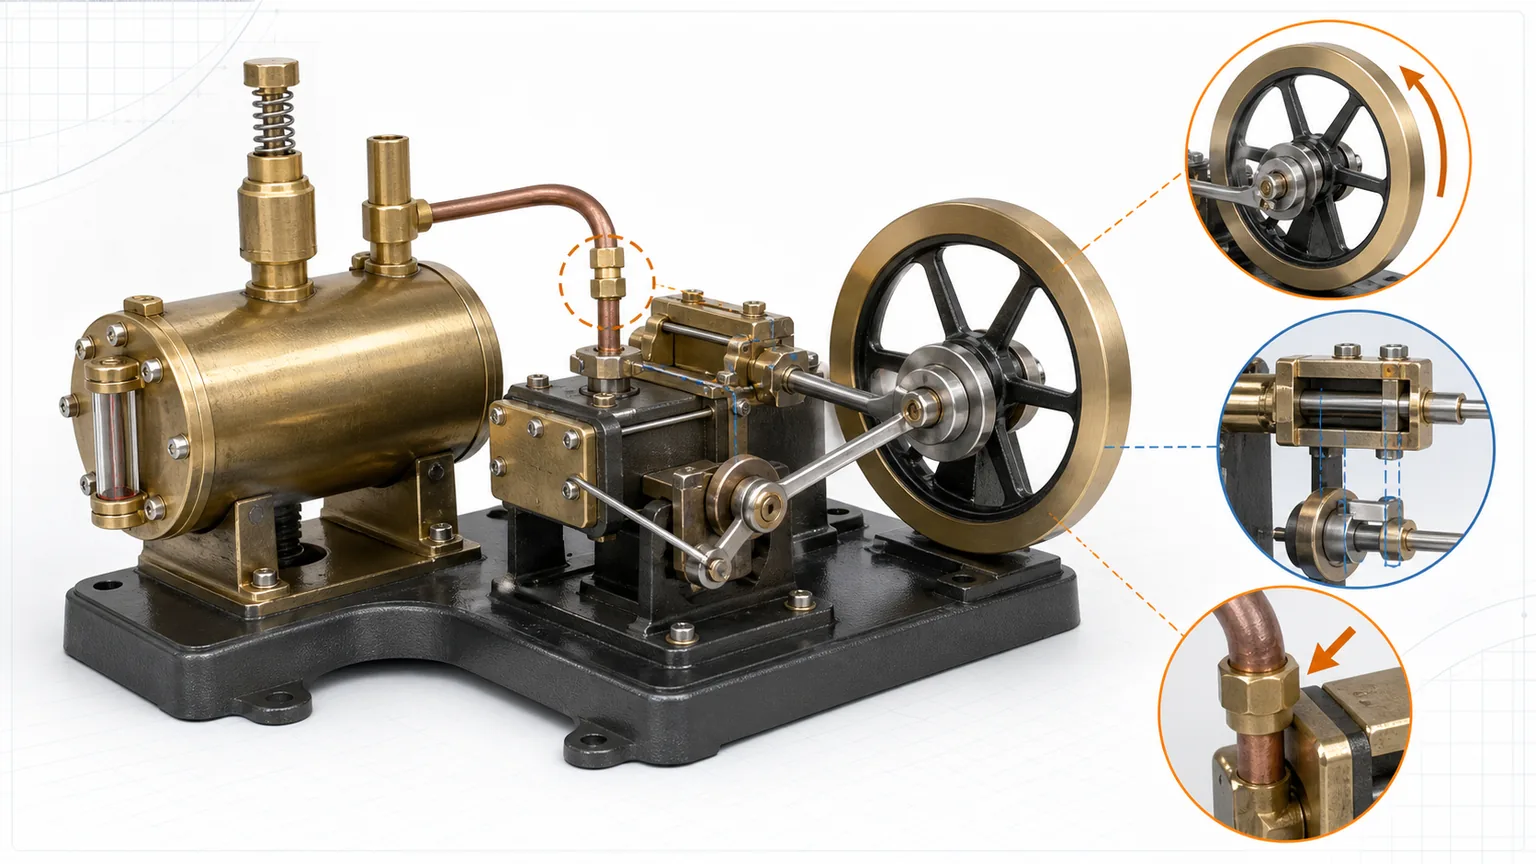
Original EnginesDIY diagnostic illustration. It shows the inspection areas; it is not a substitute for the manual supplied with your exact engine and boiler.
Quick answer: diagnose the symptom in this order
- Cool and depressurize the plant completely. Never loosen a fitting, remove a safety device or investigate a tight mechanism while the boiler is hot or pressurized.
- Turn the flywheel only if the model's manual permits cold hand rotation. A tight point that repeats at the same crank angle indicates mechanical alignment, contact or linkage trouble before it indicates low steam pressure.
- If cold rotation is free, inspect the steam path and valve motion. Confirm the water level, controls, pipework, slide or piston valve and eccentric relationship against the model-specific diagram.
- Test only by the manufacturer's approved method. Do not increase pressure, defeat the safety valve or copy another model's fuel, oil, timing or pressure setting.
- Change one documented variable at a time. Record the symptom, crank position and result; random adjustment destroys diagnostic evidence.
This guide is a symptom-first framework, not a universal commissioning procedure. Small live-steam plants store energy, expose hot surfaces and contain model-specific pressure controls. The UK Health and Safety Executive notes that failures of small pressure vessels can arise from overheating or overpressure and emphasizes correct operation, inspection and maintenance in its experimental report on small pressure vessels, including miniature steam engines.
Start with a safety gate, not a pressure test
Stop and let the entire plant cool before diagnosis. Verify that pressure has returned to atmospheric pressure using the model's specified procedure. Keep hands away from the burner, boiler shell, steam line, cylinder, exhaust and flywheel until they are cool. The HSE's pressure-systems guidance explains why: stored pressurized energy and released steam can cause serious injury, while correct water level, controlled startup and safe depressurization are fundamental operating controls.
Do not continue if the boiler is dented, heavily corroded, leaking from its shell, missing a water-level indication, or fitted with a damaged, seized or uncertain safety valve. Never plug, weight, tighten or “calibrate by feel” a safety valve. Those conditions require the manufacturer, supplier or a competent pressure-equipment specialist—not another firing attempt.
For educational settings, CLEAPSS publishes a dedicated model steam engine operating guide that treats pre-use condition checks and supervised operation as prerequisites. Even at home, the same conservative principle applies: the exact manual controls the approved fuel, water, lubricant, test method, operating limit, supervision and minimum user age.
The cold-to-pressurized diagnostic split
| Observation | Most useful first branch | What not to do |
|---|---|---|
| Flywheel stops at the same angle every turn while cold | Mechanical contact, alignment, crank/rod geometry or valve linkage | Do not add pressure to force it through |
| Rotation becomes tight only after screws are fully tightened | Bearing alignment, distorted frame, side load or incorrect spacer order | Do not leave structural screws loose to make it run |
| Cold mechanism is smooth, but the engine rocks or stalls under an approved test | Valve timing, reversing-link position, steam-path restriction or leakage | Do not raise pressure beyond the manual |
| Steam escapes from a joint | Correct gasket, mating surfaces, fitting condition and documented tightening procedure | Do not tighten a hot, pressurized joint |
| Engine slows progressively as it warms | Lubrication, thermal expansion, condensate handling or alignment | Do not substitute an unspecified oil |
This split is valuable because steam cannot repair a mechanical hard point. If the crankshaft cannot complete a smooth cycle without pressure, extra pressure merely adds stored energy to an unresolved obstruction. Conversely, a mechanism that is consistently free when cold directs attention toward flow, sealing and the timing of inlet and exhaust events.
Step 1: map a repeating tight point
With the boiler cold, unpressurized and secured, follow the manual's permitted method for turning the flywheel. Move slowly through at least two complete crank revolutions. Do not use pliers, a drill or a long lever. Note whether resistance occurs at one repeatable crank angle, across a broad region, only in one direction or randomly.
- One repeatable angle: look for crank throw, connecting rod, piston, crosshead or valve linkage reaching a geometric limit or touching another part.
- Two repeatable points per revolution: inspect alignment and side load across both ends of the stroke, not just the point where the engine stops.
- Continuous drag: check bearing alignment, packing or gland adjustment, contamination and lubricant condition against the manual.
- Random roughness: stop and look for loose hardware, debris, damaged gear teeth or a part moving on its shaft.
Mark the flywheel position with removable tape rather than scratching a reference line. A short video taken from the same angle can help support identify which rod, crank or eccentric reaches its limit at the marked position.
Step 2: distinguish fastener preload from correct alignment
A common but unsafe workaround is to leave a bearing cap, frame screw or cylinder mounting screw loose because the engine then turns. That is evidence of misalignment, an incorrect spacer, burr, contaminated mating face or uneven assembly—not a finished repair.
Return to the exploded diagram and parts order. Confirm that washers, shims, spacers, bearing caps and reversing-link components are in their documented positions. Inspect mating faces for paint, debris or raised damage. Tighten only in the specified sequence and to the specified value if one is given. If the mechanism binds only at final tightening, stop before modifying a part; photograph the assembly and ask the supplier to confirm the correct stack and orientation.
Step 3: understand what the eccentric and slide valve must do
Many stationary and marine model steam engines use an eccentric on the crankshaft to move a slide or piston valve. The valve alternately connects the cylinder ports to steam admission and exhaust. The University of North Texas Libraries' digitized 1894 steam-engine main slide-valve patent documents a historical main slide-valve mechanism. Cornell's mechanical-model archive documents a horizontal slide-valve engine in which an eccentric rod drives the sliding valve while the crank and flywheel coordinate piston motion.
The essential relationship is phase, not simply “the rod moves.” Near a piston dead center, the valve must be in the position specified for the intended direction so the next pressure event acts on the correct side of the piston. A reversing mechanism changes that relationship. If the reversing link is between its intended forward and reverse positions, admission may be weak or contradictory.
Use only the model's timing marks or diagram. Do not assume that the eccentric angle from another engine applies, even when both engines look similar. Oscillating-cylinder engines, slide-valve engines and piston-valve engines control steam differently. Record the original position before any permitted adjustment, and stop if the eccentric is slipping on the shaft or a linkage cannot reach its full documented travel.
Step 4: check the steam path without chasing pressure
After the cold mechanism is proven free, trace the intended path: boiler outlet, control valve, pipe, steam chest, admission port, cylinder, exhaust port and outlet. A restriction, incorrect connection, closed control or blocked exhaust can prevent operation even with an apparently normal boiler.
Verify water level and control positions before heating. Wilesco's official description of its model steam engines identifies the boiler, water gauge and safety valve as functional parts and emphasizes model-specific instructions. That supports a general inspection principle, but it does not authorize applying Wilesco settings to a different brand.
If the manufacturer permits a controlled bench test, use only the approved source, connection and limit. Never apply workshop compressed air merely because it is available; an unregulated supply can exceed a model's intended test condition. A test should answer one question at the lowest approved condition—for example, whether valve events alternate correctly—not prove that the boiler can overpower a fault.
Step 5: separate a leak from its cause
A visible leak identifies a location, not necessarily the underlying cause. A joint may leak because the gasket is missing, damaged or misaligned; mating surfaces are contaminated; a fitting is cross-threaded; the pipe loads the connection sideways; or the documented tightening sequence was not followed. Condensate at the exhaust is not automatically a failed joint, so identify exactly where the moisture or vapor emerges.
- Stop the approved test and fully cool and depressurize the plant.
- Photograph the joint and compare the parts to the exploded diagram.
- Inspect the correct gasket or seal and mating surfaces without enlarging ports or applying an unknown sealant.
- Check whether tubing or a rigid fitting is pulling the joint out of alignment.
- Reassemble only by the documented method and perform one controlled recheck.
A leak from the boiler shell, sight-glass mounting or safety-device connection is not a routine “tighten it more” task. Stop using the plant and seek qualified support.
Lubrication: correct point, correct lubricant, correct amount
Lubrication problems can appear as continuous drag, warming bearings, squeak, scoring or an engine that slows after a brief run. But “add more oil” is not a universal answer. Bearings, cylinders and steam lines may require different lubrication arrangements, and elastomers or seals may be incompatible with an improvised product.
Identify every lubrication point in the exact manual. Clean the point before applying the specified lubricant and amount. Too much oil can contaminate surfaces or obstruct small passages; too little can damage a bearing or cylinder. Never add oil to a hot, pressurized system. If the manual does not identify an oil, ask the manufacturer or supplier using the exact model number rather than borrowing a recommendation from a visually similar engine.
A symptom matrix for faster support
| Symptom | Evidence to capture | Likely inspection area | Stop condition |
|---|---|---|---|
| Locks at one angle | Flywheel mark and side-view video | Crank, rod, crosshead, piston and valve linkage | Metal contact or need for force |
| Binds when tightened | Screw sequence and spacer layout | Bearing/frame alignment and mating faces | Structural screws must remain loose |
| Rocks but will not continue | Direction, valve position and exhaust behavior | Eccentric phase, reverser position and valve travel | Uncertain timing reference |
| Hisses with little motion | Exact leak location and cold photos | Joint, gasket, valve face or packing | Boiler, gauge or safety-device leak |
| Slows as temperature rises | Cold/run duration and affected bearing | Lubrication, expansion, condensate or alignment | Discoloration, smoke or abnormal heat |
Apply the framework to different EnginesDIY steam architectures
Start at the model steam engine collection to compare architectures. Product links below are selection references; the included manual remains the operating authority.
- The RW-BL1K reversible live-steam engine and boiler kit makes reverser position and valve phase especially relevant when an engine rocks or runs in only one direction.
- The RW-BV2C V-twin live-steam engine adds multi-cylinder linkage and shared steam-path checks.
- The RW-V4 four-cylinder marine steam engine requires a systematic cylinder-by-cylinder approach rather than adjusting several linkages at once.
- A working vertical single-cylinder steam engine provides a simpler motion path for learning how piston, crank and flywheel relate.
- The RETROL beam steam engine model exposes a different linkage geometry, so slide-valve assumptions from a horizontal engine may not transfer.
For terminology, setup context and boiler-safety foundations, read our broader model steam engine kits: how they work, build and safety guide. Use this troubleshooting page when the central intent is diagnosing a specific symptom, not learning the general architecture.
When to stop and contact support
Stop immediately for a damaged boiler, uncertain safety valve, shell or sight-glass leak, missing pressure-control component, stripped pressure fitting, persistent metal contact, cracked frame, seized bearing, slipping crank/eccentric, unknown timing baseline, abnormal heat, smoke or a manual that does not match the supplied model.
Send support the exact model and order reference, clear cold photos, the assembly step where the symptom began, whether the flywheel is free when fully depressurized, the repeatable crank angle, and what changed immediately before the fault. Do not send an operating video if producing it would require bypassing a guard, exceeding a limit or repeating an unsafe test.
Frequently asked questions
Why does my model steam engine bind when I tighten the screws?
Tightening may reveal bearing misalignment, a missing or reversed spacer, contaminated mating faces, uneven assembly or side load. Leaving structural screws loose is not a repair. Return to the parts order and tightening procedure, document the condition and contact support before modifying parts.
Can I use compressed air to find the fault?
Only if the exact manufacturer explicitly permits it and specifies the source, connection and limit. General workshop air is not automatically safe for a small engine or boiler. First prove that the cold mechanism rotates freely.
How do I know whether valve timing is wrong?
A free cold mechanism that rocks, stalls, runs only in one direction or shows admission at the wrong piston position may justify a timing inspection. Compare crank position, eccentric and valve travel with the exact model diagram; do not copy an angle from another engine.
Should I tighten a steam leak while the engine is running?
No. Stop, cool and fully depressurize the plant first. Identify the exact joint and inspect its specified gasket, surfaces, alignment and tightening method. Boiler-shell or safety-device leaks require qualified support.
What oil should I use in a model steam engine?
Use only the lubricant and quantity specified for the exact model and lubrication point. Cylinder, steam-line and bearing requirements may differ. If the manual is unclear, ask the manufacturer or supplier by model number rather than substituting a generic oil.
Conclusion
The most efficient troubleshooting sequence is also the safest: cool and depressurize, prove free cold rotation, map any repeatable tight point, verify assembly and linkage, then inspect valve timing, steam flow and leaks using only the approved test method. Pressure should confirm a correct mechanism, never force an incorrect one.
References
- UK Health and Safety Executive, Experimental investigation of small pressure vessel failure.
- UK Health and Safety Executive, Safety of pressure systems: Approved Code of Practice.
- CLEAPSS, PS080: How to use a model steam engine.
- University of North Texas Libraries, Main Slide-Valve and Throttle-Valve for Steam-Engines (U.S. Patent, 1894).
- Cornell University Library, Reuleaux Collection of Kinematic Mechanisms: steam-engine model documentation.
- Wilesco, Official model steam engine overview.
Leave a comment