

Quick answer
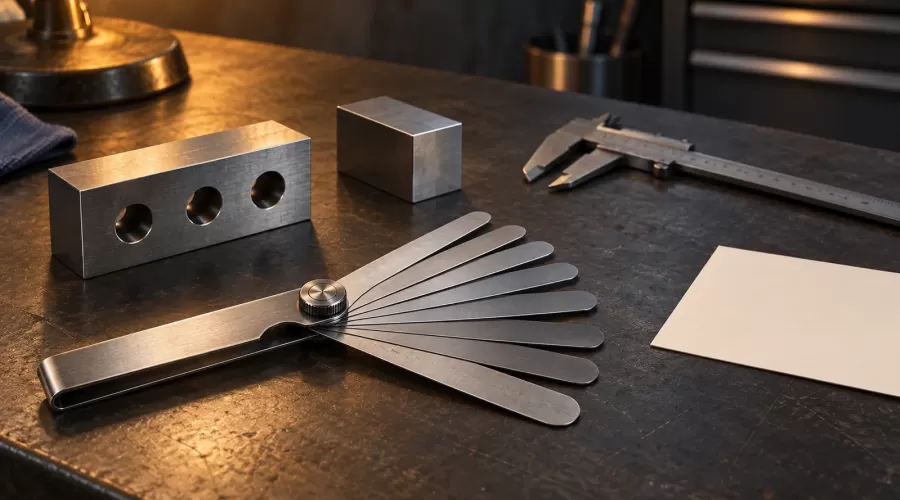
A feeler gauge compares an accessible gap with a leaf of known nominal thickness. For a model engine, first confirm the manufacturer's measuring location, engine position and temperature condition. Read the leaf's units, check its condition, and use gentle insertion rather than making a thicker blade fit. A blade passing through a gap is an observation, not permission to change a clearance or proof that the entire assembly is correct.
A tiny gap can create a surprisingly large argument. One person calls a leaf a smooth fit; another calls the same leaf tight. A third reads an inch marking as millimetres. Before adjusting anything, separate the instrument question from the engine specification question. This guide addresses the instrument and the evidence you can record. It does not supply valve-lash, piston-ring, bearing, ignition or coupling settings for an unidentified model.

Key takeaways
- A set's maximum and minimum thickness do not describe all the individual leaves between them.
- Unit markings, usable blade shape and blade condition matter before insertion.
- Do not use a blade as a wedge, scraper or alignment lever.
- A repeatable comparison needs the same location and specified assembly condition.
- Record an uncertain result honestly instead of converting a feel into a precise dimension.
- The applicable engine instructions decide whether a gap is acceptable.
What a feeler gauge tells you—and what it does not
The basic question is whether a selected leaf can enter the intended gap under a controlled, gentle check. It is different from using a caliper to read a component's outside size. A leaf can be useful where jaws would not reach or would measure the wrong surfaces. It cannot automatically reveal the whole shape of a gap, identify the cause of an abnormal result, or tell you which replacement part to order.
Starrett's thickness-gage overview describes narrow-gap applications and different blade forms. Those general uses explain why the tool appears in workshop kits; they do not establish that every miniature-engine gap should be checked with it. Access and the exact measuring method remain part-specific.
Keep three questions separate: what did the blade do, what does the model's documentation require, and what action is authorized? For example, “the selected leaf entered at this location” is an observation. “The clearance is within specification” requires the correct specification and method. “The engine is ready to run” requires much more than one gap observation. Writing all three as a single conclusion hides missing evidence.
For the wider instrument decision, see our caliper versus micrometer guide. Choose the tool for the physical feature rather than choosing a number of decimal places first.
Choose coverage, not just the largest leaf count
Begin with the manual's units and stated method. Then compare the proposed set's actual leaf list with the measurements you need. A bigger fan is not necessarily more suitable if the useful sizes are absent or the blade cannot reach the designated location without bending. A compact set may be sufficient for one documented task and unsuitable for another.
GEDORE's official feeler-gauge range includes separate metric and inch sets with different coverage. The lesson is to inspect the exact set identity rather than treating a familiar brand name as a complete specification. Keep the tool's own leaflet or catalogue reference with your bench records.
Bahco's precision-measuring catalogue lists several feeler-gauge families with different leaf counts. This supports checking the selected product's composition, not assuming that two similarly named sets contain the same blades. No tool mentioned here is claimed to be included with an EnginesDIY kit.
Before buying, make a short requirement list: units, individual sizes around the documented check, blade length and width, access shape, readable markings, and any inspection or verification requirement. If the manual is unavailable, ask for it first. Purchasing a convenient-looking gauge does not resolve an unknown engine setting.
Read the marking before you touch the gap
Read both the value and its unit. Do not rely on a remembered colour, the blade's position in the fan, or a number copied from another owner's model. If a leaf has dual markings, identify which marking corresponds to the manual's unit system and preserve the original notation in your record. A missing decimal point in a photograph can create a very different interpretation.
Mitutoyo's Series 184 description identifies marked leaves and individual leaf handling features. Even with clearly marked tools, the operator still needs to select and record the right leaf. A stamp is a nominal identity; it is not evidence of your gauge's current inspection status.
If a conversion is necessary, write the original value and the converted value with their units. Preserve enough detail to show what was converted, and do not round a converted result into an assumed factory limit. Prefer obtaining the original model instruction in the applicable unit system when a rounded value might affect a decision. A conversion can reconcile units; it cannot reconcile different models, temperatures or measuring positions.
Inspect the blade and the accessible surfaces
Work only with a safely isolated, stationary assembly in the condition specified for the check. Disconnect the relevant power or ignition source and follow the model's safety instructions. Let hot parts reach the required condition. Keep fingers clear of spring-loaded or moving mechanisms even when the engine is not running. A convenient opening is not automatically a safe measuring point.
Examine the intended leaf for a bent tip, crease, corrosion, damaged edge or unreadable marking. If it is questionable, remove it from the decision rather than trying to compensate by feel. Do not sand or grind a measuring leaf to make it fit and then keep treating its original marking as valid. Replacement or qualified verification is a different task from an engine clearance check.
Observe accessible surfaces without scraping them with the gauge. Debris, damage or uncertainty about the actual contact faces makes the result questionable. Use only the cleaning approach permitted for the assembly and the tool. Do not prescribe a universal solvent, dry condition or added lubricant: the required condition belongs to the relevant instructions. Record it instead of silently changing it between attempts.
A useful model-engine bench checklist keeps lighting, parts identity and clean work organisation together. Preparation reduces avoidable ambiguity, but it does not certify the gauge or the engine.
Keep insertion gentle and geometry consistent
Approach the specified location in the intended orientation. If the blade cannot reach without a sharp bend, levering or contact with unrelated parts, stop and review the method. Do not make access by dismantling an assembly beyond the approved procedure. A narrow blade's ability to enter one corner does not prove the same spacing across the whole contact region.
Record what happened using restrained language: entered freely, entered with the specified gentle fit, did not enter gently, or could not be assessed. Avoid inventing a universal force threshold. When a maker describes a particular fit, use that instruction and repeat the comparison without increasing force to obtain the preferred answer. Do not tighten an adjustment simply because a blade can be pulled out with effort.
SKF's discussion of industrial bearing-clearance measurement illustrates how measuring force and component position can affect a result. Its industrial bearing procedures and calculations are not instructions for miniature ball bearings. The transferable caution is limited: a measuring tool can disturb what you are trying to measure.
For a bearing question, use the separate bearing clearance, endplay and preload guide. Do not push leaves into a small sealed bearing or dismantle it to imitate a large industrial bearing illustration.
The U-C-F record: units, condition and fit
The U-C-F record separates units, blade condition and fit before a small-gap result is used. It is an evidence worksheet, not a calibration certificate or a factory acceptance standard. Add the exact model/version, manual revision, measuring location, specified temperature and mechanism position to every entry. Without those context fields, two sensible observations may describe different tasks.
| Field | Record | Do not infer |
|---|---|---|
| Units | Leaf marking, unit, tool/set identity and original specification | That a bare number is millimetres |
| Condition | Blade inspection, surface condition, access and specified assembly state | That appearance establishes calibration |
| Fit | Location, orientation, gentle insertion observation and repeatability | That forced entry means acceptable clearance |
| Decision | Applicable instruction and remaining uncertainty | That a gap observation authorizes adjustment |
For an illustrative record, an owner might write: “Model and revision confirmed; documented measuring point photographed; leaf identity and units recorded; undamaged leaf; repeated gentle checks consistent.” This contains no universal clearance number. Another owner might write: “Manual revision unknown; marking unclear; access obstructed; no valid conclusion.” The second record is useful because it explains why an adjustment should wait.
When readings disagree
Start by checking the setup rather than selecting the result you like. Were both attempts at the same location? Was the mechanism in the specified position? Did someone change an adjustment or assembly condition between checks? Was the same leaf used, with the same units and undamaged measuring region? A short repeat under a controlled setup is more informative than repeatedly forcing a larger leaf.
If different observers disagree, document the disagreement and review the maker's fit description together. Do not average subjective judgements into a claimed precision. If the next listed leaf does not enter gently, retain that observation alongside the first rather than reporting an exact dimension unsupported by the tool, technique and instructions. A formal tolerance decision may require a better-defined method or qualified measurement.
Do not stack leaves merely because the desired size is missing. Use a combination only when the applicable procedure permits it and the measuring approach can be controlled. A nominal sum does not account for condition, interfaces or access. Do not substitute paper, foil, a business card or an unidentified strip as though it were a verified measuring leaf.
Keep diagnosis separate from adjustment
A gap that appears wrong can have several explanations. The measuring position may be wrong, the tool may not suit the access, the instructions may belong to a different version, or the assembly may need assessment. None of those possibilities is resolved by turning the nearest screw. Preserve the initial observation and stop before a change destroys the evidence.
For example, coupling alignment involves more than a blade entering between two visible faces. Use the dedicated shaft-coupling alignment guide to separate geometric questions. Likewise, a feeler-gauge check does not identify a screw's diameter or pitch; that belongs to our screw-thread identification guide.
Before contacting support, gather the exact engine designation, selected configuration, instruction revision, location photographs and U-C-F record. Ask a specific question: “Is this the correct checking location and state for this revision?” That is easier to resolve than “What gap should every engine have?” Avoid buying a replacement based solely on a leaf thickness or another owner's photograph.
Buying a model with measurement needs in mind
When browsing model-engine kits, establish whether the item is an assembly kit, motorised demonstration or fuel-burning engine, and inspect its actual options and included items. Ask which tools and checks its corresponding instructions require. This article does not claim that a particular kit includes a gauge or that a generic accessory is compatible.
Choose a build scope you can support with the right documentation and safe workspace. An engine's complexity, access and required checks matter more than the appearance of a comprehensive tool kit. If the product's exact version or manual is unclear, resolve that information before planning adjustments. Accurate questions are part of a good buying decision, not a reason to guess confidently.
Frequently asked questions
Does a leaf passing through prove the clearance is correct?
No. Acceptance requires the exact model specification, location, assembly condition and measuring method.
Can I force a thicker leaf into a tight gap?
No. Stop if gentle insertion is not possible; do not use the gauge as a wedge.
Are more leaves always better?
No. Compare individual sizes, units and access shape with the documented task.
Can a stamped thickness replace tool verification?
No. A marking identifies nominal thickness, not current condition or verified accuracy.
Can I use this guide to set valve clearance?
No. Obtain the correct engine manual and its specific checking and adjustment procedure.
Should I stack leaves to reach a missing size?
Only when the applicable procedure permits the combination and its measuring conditions can be controlled.
What should I record when the result is uncertain?
Record model identity, units, blade condition, location, setup and observed fit, then state the unresolved question.
Conclusion
A good feeler-gauge result begins before the blade reaches the engine. Confirm the instructions, read the units, inspect the leaf and preserve the intended measuring condition. Record a gentle fit as an observation, not a universal setting or a readiness certificate. The U-C-F worksheet makes uncertainty visible so that the next step follows evidence rather than extra force.
Leave a comment