

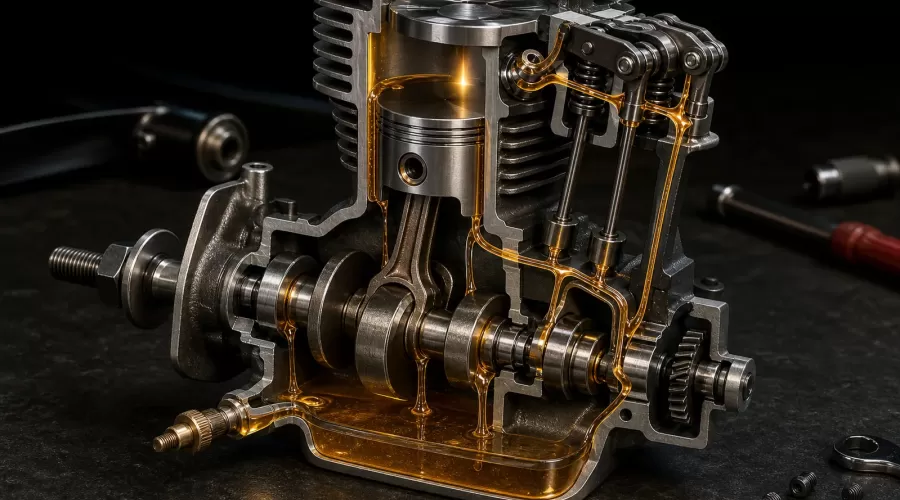
Quick answer: Choose model-engine oil only after identifying how the engine is designed to carry lubricant. A glow or nitro engine may receive oil in its fuel; a gasoline two-stroke normally uses a maker-specified fuel/oil mixture; a four-stroke may have a sump, a breather-fed or total-loss system, or separate external oiling points. Use the exact manual for fluid type, ratio, quantity and interval. Do not assume that automotive oil, air-tool oil, after-run oil or a fuel premix is interchangeable.
Key principle: Lubrication is a circuit of surfaces, not a bottle label. The safe choice follows five questions: what architecture is present, which surfaces need oil, how oil reaches them, what fluid the maker specifies, and what evidence confirms the path is working.
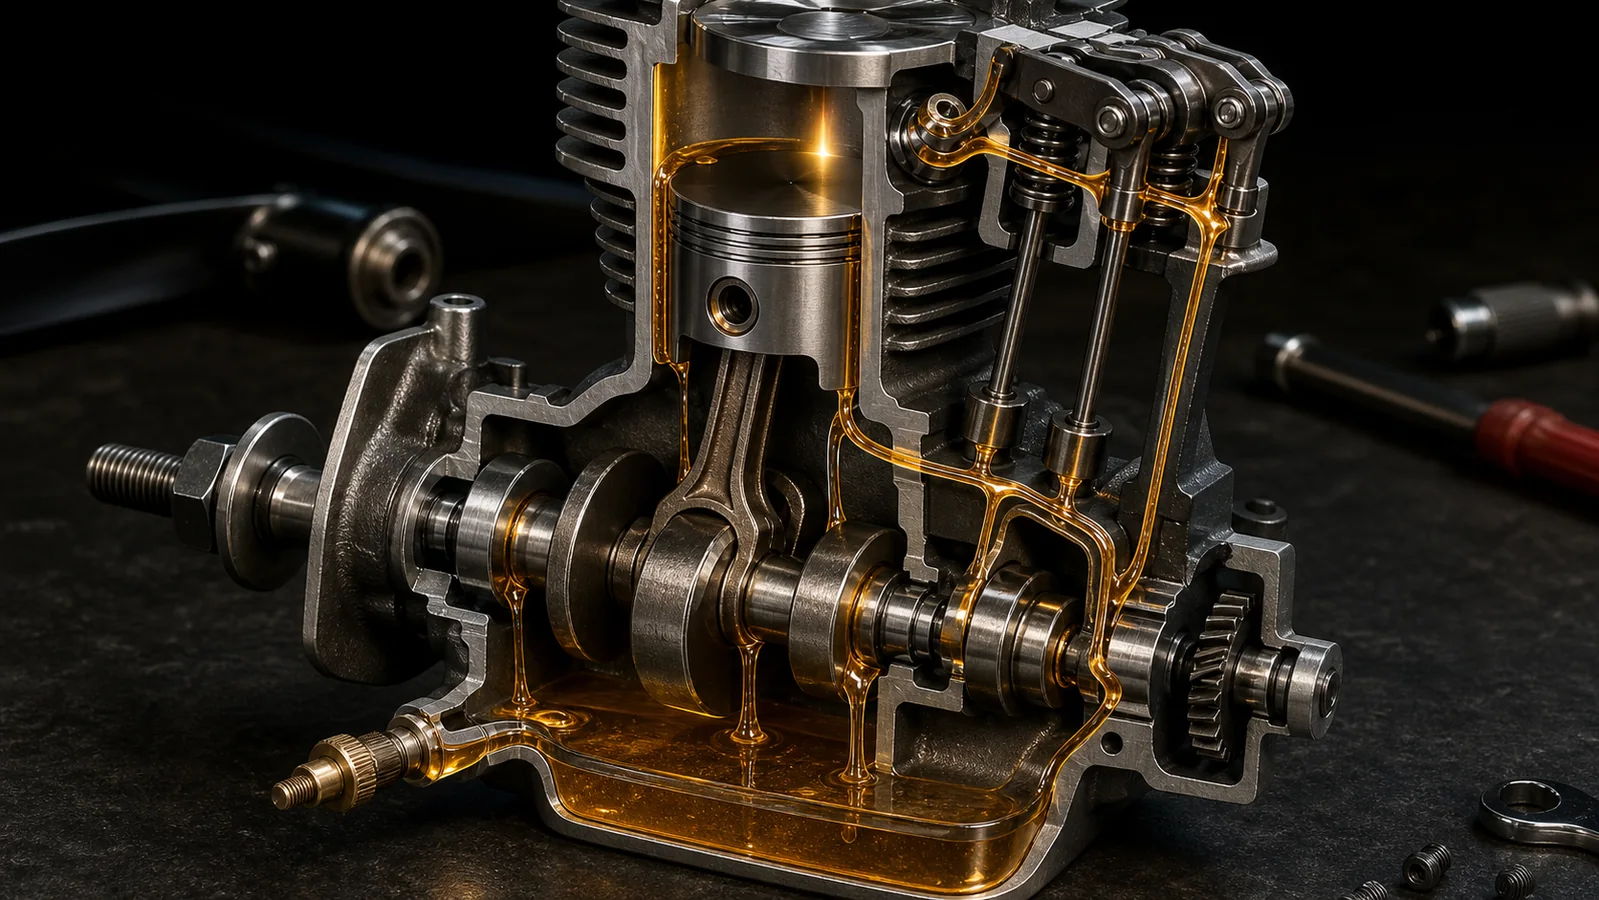
What does lubrication do inside a model engine?
Moving metal surfaces are not perfectly smooth. Under a microscope, their high points can touch, generate heat and tear material from one another. NASA describes tribology as the study of interacting surfaces in relative motion, including lubrication, friction and wear. A suitable lubricant forms a film that helps separate those surfaces. In an engine, it also carries heat, transports contamination toward a drain or exhaust path, protects against corrosion and can help sealing at the piston ring and cylinder wall.
The FAA powerplant handbook explains the same functions in operating engines: oil reduces friction, assists cooling, helps seal between moving parts, cushions loads and carries debris. Those functions transfer to miniature mechanisms, but the plumbing does not. A full-size pressure-fed engine, a small splash-lubricated four-stroke and a methanol-fueled glow engine may all depend on oil, yet they deliver it in completely different ways.
This distinction explains why “What oil should I use?” is incomplete. The right first question is “How does this exact engine move lubricant to the crankshaft, cylinder, cam and valve gear?” If that path is unknown, adding a better-sounding oil can still leave one surface dry or flood another.
Four model-engine lubrication architectures
| Architecture | How oil reaches parts | Typical examples | Main error to avoid |
|---|---|---|---|
| Oil carried in fuel | Lubricant travels with the fuel-air charge and exits with exhaust residue | Many glow/nitro engines and some model two-strokes | Reducing the oil percentage without maker approval |
| Gasoline premix | Two-stroke oil is mixed with gasoline at a prescribed ratio | Small gasoline two-strokes and some specialist model engines | Copying a ratio from a different engine or break-in stage |
| Sump, splash or pump | Oil stored in a crankcase is splashed or pumped through internal passages | Some four-stroke miniature engines | Running with the wrong level, blocked breather or unsuitable viscosity |
| External or total-loss points | A nipple, cup, wick or manual drop feeds a specific bearing or valve mechanism | Stationary engines, exposed rockers and some model gasoline engines | Assuming fuel oil reaches every external component |
Oil-in-fuel engines
In an oil-in-fuel system, lubrication depends on the fuel formulation and the route of the incoming charge. Changing the fuel changes both combustion and lubrication. The ratio, base oil and additive package must therefore come from the current engine manual. The article nitro versus gasoline model engines explains why the fuels and ignition systems differ; it should not be read as permission to interchange oils.
Visible exhaust oil can be normal in a total-loss glow system because some lubricant must leave the engine. The amount alone does not prove that the internal film is correct. Fuel mixture, temperature, load, ring seal and exhaust design all affect what appears at the outlet.
Premix gasoline engines
Manufacturer manuals demonstrate why ratios cannot be generalized. Saito specifies particular two-stroke oils, mix ratios and break-in procedures for named gasoline engines, and some models also require oil through a crankcase lubrication nipple. That is direct evidence that “premix present” does not automatically mean “all parts lubricated.” A quantity printed for one Saito model is not a recommendation for another model, brand or displacement.
Sump and splash systems
A sump stores oil for reuse. A dipper, slinger or rotating crank may splash it, while more elaborate engines use a pump and drillings. The level matters: too little can uncover the pickup or fail to generate splash; too much can make the crank whip the oil into foam, increase drag, overwhelm a breather or send oil into the combustion chamber. Check level using the orientation and method specified by the maker—threaded versus unthreaded dipsticks, upright versus level measurements, and warm versus cold checks can differ.
External and total-loss lubrication
Exposed rocker arms, pushrod ends, valve stems, governor joints, crossheads and plain bearings may use drops, cups or wicks. Oil added there is consumed or expelled rather than returned to a sump. The correct quantity is enough to maintain the prescribed film without flooding ignition parts, belts, brakes or hot exhaust surfaces. A live-steam engine may use steam-compatible cylinder oil in one path and a different bearing oil externally; this article does not combine steam and combustion-engine requirements.
How to choose oil for a miniature engine
- Identify the exact model and revision. Photograph the nameplate, ignition module, carburetor and lubrication fittings. Manuals can change with production versions.
- Map every lubrication path. Mark fuel-carried, sump-fed, splash-fed and manually oiled surfaces separately.
- Use the maker’s fluid specification. Record oil type, viscosity or product class, mix ratio, fill level, break-in change and service interval exactly as written.
- Check material and fuel compatibility. Methanol, gasoline, seals, tubing, paint and storage preservatives can react differently.
- Confirm the operating range. Ambient temperature, load, RPM and cooling affect the film. ASTM’s viscosity-index practice shows that viscosity changes with temperature; a familiar grade name does not guarantee identical behavior at operating temperature.
- Record what is unknown. If the manual is missing, ask the supplier or manufacturer. Do not turn uncertainty into a guessed ratio.
Briggs & Stratton’s official small-engine guidance says oil reduces friction and temperature and recommends selecting oil for the specific engine and conditions. That principle is useful, but an automotive or mower grade should not be transferred to a model engine unless its maker permits it. Additives designed for one clutch, catalyst, fuel or storage regime may be unsuitable for another.
Viscosity is necessary but not sufficient
Viscosity describes resistance to flow. Oil must be fluid enough to reach a surface during starting and strong enough to maintain a film at operating temperature and load. ASTM notes that viscosity index expresses how strongly kinematic viscosity changes between reference temperatures. It does not by itself rate corrosion protection, fuel miscibility, deposit tendency or suitability for a particular model engine.
A thicker oil is not automatically safer. It can circulate slowly, increase drag, prevent a wick from feeding or make a cold engine difficult to turn. A thinner oil can reach a tight bearing quickly but may provide insufficient film under heat and load. The correct answer is the specified fluid in the specified path, not the thickest oil available.
Which model-engine parts need oil?
The exact list depends on design, but the inspection logic is consistent:
- Crankshaft journals and plain bearings: require a continuous film; confirm how the crankcase, fuel charge or oil hole supplies it.
- Rolling bearings: may be open and oil-fed, shielded, sealed or grease-packed. Do not wash grease from a sealed bearing or force oil past a seal without instructions.
- Piston, ring and cylinder: need controlled film for wear protection and sealing. Excess oil can enter combustion and create deposits.
- Cam lobes, tappets and followers: see sliding contact and high local load. Verify splash, gallery or manual pre-lube before first start.
- Rocker arms, pushrod tips and valve stems: exposed gear may need manual drops even when the crankcase has oil.
- Timing gears and chains: may use splash, mist, grease or a dedicated enclosure. Never substitute grease where it can migrate into a clutch or sensor.
- Governor and linkage pivots: use only a minimal compatible lubricant if the manual calls for it; sticky oil can collect dust.
- Starter gears, clutch and drivetrain: are separate systems. Some friction surfaces must remain dry.
For mechanical context, review the miniature four-stroke break-in guide and valve timing and lash guide. Break-in does not justify unapproved oil or an arbitrary rich mixture; it makes correct lubrication, temperature and load control more important.
A safe pre-start lubrication workflow
- Secure and inspect. Disable ignition and starter. Look for loose fittings, empty cups, cracked lines, blocked breathers, leaks and contamination.
- Verify free rotation. Turn only as the manual permits. A dry or damaged engine that feels tight should be investigated, not forced.
- Fill or mix accurately. Use clean graduated equipment dedicated to the correct fuel or oil. Label containers and date the mixture.
- Pre-lubricate specified points. Follow the manual for cam, rocker, cylinder or lubrication-nipple preparation. Keep oil off electrical connectors and friction surfaces.
- Prime the path if required. Some pumps or lines need a documented priming procedure. Never spin a dry pump at high speed hoping it will pick up.
- Start at the documented baseline. Use the correct fuel, carburetor setting, cooling and load. The model-engine carburetor guide helps keep mixture changes separate from oil diagnosis.
- Observe evidence, not one symptom. Watch oil pressure or return flow if fitted, temperature trend, sound, exhaust, leaks and free rotation after shutdown.
- Log the run. Record oil product, batch, ratio or level, ambient temperature, RPM/load, duration and observations. Change one variable at a time.
Under-lubrication and over-lubrication diagnosis
| Observation | Lubrication possibility | Other causes to check | Response |
|---|---|---|---|
| Rapid heat rise or tight rotation | Low level, blocked path, wrong viscosity, dry assembly | Lean mixture, excess load, ignition timing, cooling fault, tight clearance | Stop; inspect before another run |
| Blue smoke or oily exhaust | Excess fill, high premix oil, oil entering chamber | Normal total-loss discharge, rich fuel, poor ring seal | Compare with manual and baseline; do not diagnose by color alone |
| Foam, breather discharge or leaks | Overfill, aeration, blocked return or breather | Loose fasteners, damaged seal, excessive blow-by | Shut down and correct level/path |
| Knock, squeal or rough bearing sound | Film failure or damaged surface | Combustion knock, loose flywheel, gear or valve fault | Stop immediately; do not mask noise with thicker oil |
| Hard starting after storage | Gummed oil, corrosion, hydraulic lock from excess preservative | Stale fuel, weak ignition, low compression, stuck valve | Disable ignition, inspect and clear safely |
Temperature is especially multi-causal. The overheating and cooling guide separates heat generation from heat rejection. Low compression can also change starting, blow-by and oil behavior; use the compression and leak-down guide rather than compensating with extra oil.
Storage, corrosion and after-run oil
After-run oil is a storage treatment, not a universal operating lubricant. Its purpose may be to displace moisture, coat internal surfaces and reduce corrosion after certain fuels. The correct product and application depend on the fuel, seals, bearings and manufacturer. Adding too much can cause hydraulic lock, contaminate a plug or create deposits at the next start.
For storage, follow the manual’s fuel-draining or run-dry procedure, allow the engine to cool, apply only the prescribed preservative through the specified opening, turn the engine as directed to distribute it, and store in a dry position that will not flood a cylinder. Before restarting, inspect for free rotation and remove excess preservative by the approved method. Never energize an engine that may contain incompressible liquid above the piston.
Limits, safety and purchasing checklist
- Fact: lubricants reduce friction and wear by helping separate moving surfaces; viscosity changes with temperature.
- Reasonable inference: mapping the path before selecting the oil reduces dry points, overfill and incompatible-fluid errors.
- Supplier statement: oil brand, class, mix ratio, fill quantity and service interval are valid only for the named engine and manual version.
- Unknown without evidence: the safe substitute, remaining oil life, internal flow and cause of smoke on an unspecified engine.
When comparing a single-cylinder gasoline model, an inline-two nitro engine kit or a miniature OHV inline-four, ask for the current manual, lubrication diagram, fuel/oil requirement, included oil fittings, break-in procedure, storage procedure and replacement seals. Product architecture—not cylinder count or appearance—determines the lubrication plan.
Work in ventilation appropriate to the fuel, keep containers closed and labeled, clean spills, wear eye protection, secure the engine, and keep hands and clothing clear of rotating parts. Used oil and fuel mixtures require local compliant disposal. Do not pour them into drains or soil.
Frequently asked questions
Can I use automotive engine oil in a model engine?
Only if the exact engine manufacturer specifies or approves it. Automotive oil may have unsuitable viscosity, additives, fuel miscibility or combustion behavior for a miniature sump, total-loss or premix system.
Does oil in the fuel lubricate the rocker arms?
Not necessarily. Some engines need separate oil at a rocker box, valve train or crankcase nipple. Trace the manual’s lubrication diagram rather than assuming the fuel charge reaches every surface.
Is more oil safer during break-in?
No universal rule exists. Too little can reduce film protection, while too much can change combustion, foul plugs, create deposits or cause drag. Use the manufacturer’s break-in fuel and oil instructions.
Why is oil coming from the breather?
Possible causes include overfill, aeration, incorrect orientation, blocked return, excessive blow-by or a normal total-loss path. Check the specified level and breather design before replacing parts.
Should I add after-run oil every time?
Follow the engine and fuel manufacturer. The need depends on fuel chemistry, storage duration, bearing materials and corrosion risk. An unapproved product or excessive quantity can create a new problem.
What should I do if the engine becomes tight while running?
Stop immediately, disable ignition and let it cool safely. Inspect lubrication supply, level, mixture, cooling, load, clearances and damage before another start. Do not force it free or hide the symptom with thicker oil.
Conclusion
The most reliable model-engine lubrication decision is architectural. Identify the engine, map the path, use the specified fluid and quantity, verify evidence of delivery, and record the result. A correct bottle in the wrong path is still a lubrication failure. When documentation is missing, label the answer unknown and obtain the manual before running the engine.
References
- FAA Aviation Maintenance Technician Handbook—Powerplant, Chapter 6
- NASA: Solid Lubrication Fundamentals and Applications
- Briggs & Stratton: Engine Lubrication Guide
- ASTM D2270: Viscosity Index Practice
- Saito FG-120TS Instruction Manual
- Saito FG-41TS Instruction Manual
- For a symptom-first starting sequence, use the model engine won't-start troubleshooting guide before changing multiple settings. To compare operating methods and assembly levels after diagnosis, browse model engine kits.
Leave a comment