

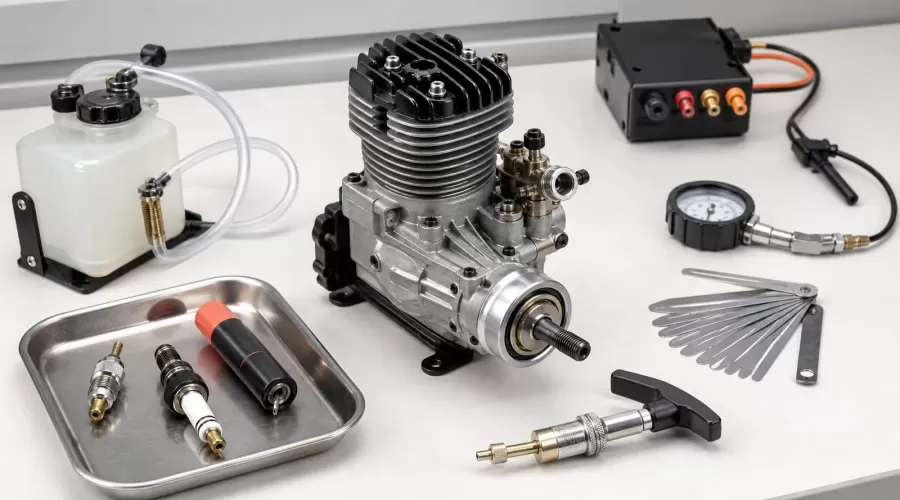
Updated July 27, 2026. A model engine that will not start should be diagnosed as a system, not attacked with random needle changes. First establish whether it can rotate normally. Then test fuel delivery, glow or spark ignition, compression, and model-specific timing or valve settings in that order. Only return to carburetor tuning after those foundations pass.
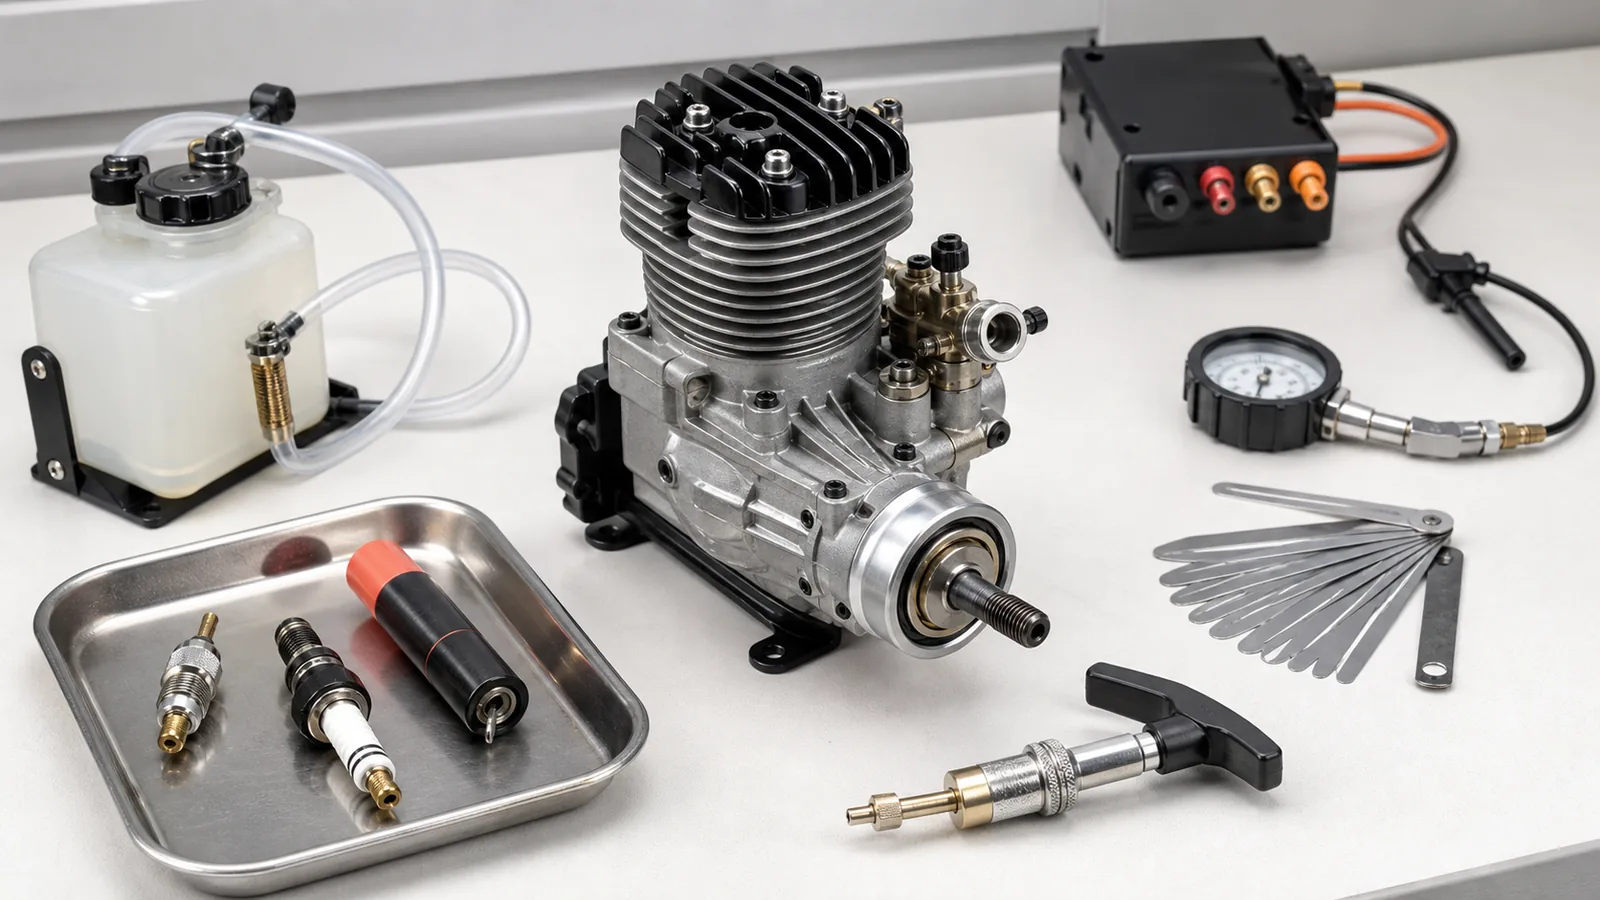
Original EnginesDIY editorial illustration. It presents a generic, stationary diagnostic setup and is not a service diagram for a particular engine.
Quick answer
Classify the failure before changing anything. “Will not start” can mean the engine will not rotate, rotates without firing, fires briefly and stops, starts only while the igniter is attached, or ran before storage but will not restart. Each state points to a different test.
- Will not rotate: stop using the starter. Check flooding, drivetrain load, corrosion, obstruction and internal damage.
- Rotates but never fires: verify fresh correct fuel, priming, a working glow plug or visible spark, compression and the documented starting position.
- Fires then stops: investigate continued fuel flow, tank venting, pressure plumbing, idle opening and an excessively lean or rich baseline.
- Runs only with the glow igniter: suspect plug condition, plug heat range, fuel suitability, mixture, idle speed or insufficient engine temperature.
- After storage: inspect hardened tubing, residue, corrosion, stuck components and stale fuel before attempting a start.
Why “fuel, spark and compression” is only the beginning
A spark-ignition engine needs an ignitable fuel-air charge, adequate compression and ignition at a useful point in the cycle. Glow engines use a heated catalytic plug rather than a timed electrical spark during normal running, but the diagnostic logic is similar: the engine needs the correct charge, enough heat to initiate combustion, compression and mechanically correct events.
The FAA Pilot’s Handbook chapter on aircraft systems describes the four-stroke intake, compression, power and exhaust sequence and explains magneto-driven ignition in full-size piston engines. That is not a model-engine service manual, but it supports the underlying separation of charge formation, compression, ignition and timing. Your engine’s own manual remains the authority for settings, fuel and starting procedure.
The common slogan also misses several causes that occur before combustion: a flooded cylinder can hydraulically resist rotation, a tight clutch can load the crankshaft, a blocked exhaust can prevent gas exchange, and a reversed or misconnected fuel system can stop delivery. A useful diagnosis therefore starts with state, not with a presumed faulty part.
Step 1: identify the no-start state
| Observed state | First checks | What not to do |
|---|---|---|
| Starter cannot rotate the engine | Remove power, inspect for flooding, drivetrain load, obstruction and corrosion | Do not apply a larger starter or more voltage |
| Rotates normally but never fires | Fuel at the carburetor, plug or spark test, compression, manual baseline | Do not turn several needles at once |
| Fires once or briefly, then stops | Continuous fuel flow, vent, pressure line, idle opening and priming amount | Do not keep priming a possibly flooded engine |
| Runs only with igniter connected | Glow plug, heat range, fuel, rich idle, engine temperature and idle speed | Do not leave the igniter attached as a permanent cure |
| Starts cold but not hot | Mixture, plug, compression trend, vapor or fuel-line condition and cooling | Do not assume a hot restart uses the cold-start procedure |
| Would start before storage | Fresh fuel, tubing, pickup, carburetor residue, after-run condition and corrosion | Do not force a stuck crankshaft or valve train |
Write down the state, exact engine, fuel, plug, starter method and every change already made. This short record prevents a second fault from being introduced during testing.
Step 2: confirm free, safe rotation
Disconnect ignition and remove the fuel supply before investigating an engine that will not turn. A flooded glow engine may contain liquid fuel above the piston. Because liquid is effectively incompressible in this context, continuing to drive the piston can damage the connecting rod or starter system. Follow the manual’s clearing procedure, which may require removing the plug and rotating the engine in a controlled orientation.
O.S. includes explicit starting and flooded-engine procedures in its official 11AX instruction manual. It also specifies mounting, propeller, fuel tank, plug and needle settings as one operating system. This is why “the starter feels weak” cannot be diagnosed until flooding and mechanical load are excluded.
With the ignition disabled, check the driven system independently where the design permits. A tight clutch, gear mesh, shaft alignment, propeller hub or accessory can imitate internal seizure. Stop if rotation has a hard mechanical stop, grinding, metal debris, a sudden loss of compression feel, or a valve train that does not move as documented.
Step 3: verify the fuel path, not just the fuel tank
Use fresh fuel of the exact type and lubricant specification stated by the manufacturer. Nitro-methanol glow fuel, gasoline-oil premix and other fuels are not interchangeable. If you are still choosing an engine platform, the earlier guide to nitro versus gasoline model engines explains the different fuel and ignition architectures before purchase.
A full tank proves only that fuel exists. The complete path includes the pickup or clunk, tubing, filter, tank vent, pressure line where fitted, carburetor inlet, metering passages and intake. Look for:
- cracked, hardened, loose or reversed tubing;
- a pickup held above the fuel or stuck against the tank wall;
- a blocked vent or incorrectly connected exhaust-pressure line;
- persistent air bubbles that indicate a leak upstream of the carburetor;
- contamination, gelled oil or deposits after storage;
- an intake seal or carburetor attachment that admits unmetered air.
The official O.S. B2103 Type R manual ties the fuel tank, tubing, air cleaner, glow plug, needle positions, priming and starting procedure together. The exact hardware differs by model, but the diagnostic lesson is transferable: fuel must arrive at the metering system without leaks or restrictions.
Step 4: test the correct ignition system
Glow engines
Remove and inspect the glow plug using the engine manual’s safe procedure. A plug can glow outside the engine yet fail under compression, and a weak igniter can produce insufficient heat. Compare the plug type and heat range with the manufacturer’s recommendation. Replace a distorted, contaminated or uncertain plug rather than using it as a diagnostic constant.
A running glow engine normally sustains plug temperature through combustion and the catalytic action of platinum-group material in the element. If it dies immediately when the igniter is removed, do not conclude that the plug alone is faulty. A very rich mixture, low idle speed, unsuitable fuel, a cold engine or poor compression can also reduce the heat available to continue combustion.
Spark-ignition gasoline engines
Confirm battery state, switch and connector condition, ground path, sensor location and specified plug gap before checking for spark. Keep fuel vapour away from any spark test. The Zenoah G26 manual specifies fuel mixture, plug, carburetor settings and starting precautions for that engine family; those values must not be copied to a different gasoline engine.
Electronic ignition timing can be wrong even when a plug visibly sparks. A moved sensor, loose hub or incorrectly assembled drive component can shift the event away from the required crank position. Use the model’s timing procedure and stop if the reference marks or sensor geometry are uncertain.
Step 5: evaluate compression without inventing a universal number
Compression readings depend on engine architecture, displacement, ring or piston fit, temperature, starter speed, gauge volume and test method. A generic pressure threshold from an unrelated automotive engine or forum is not a reliable pass/fail value for a miniature glow or gasoline engine.
Use three levels of evidence:
- Comparative feel: with ignition disabled and the manual’s safe handling method, note whether compression resistance is repeatable through successive rotations.
- Mechanical inspection: check fasteners, head seal, plug seal, valves and clearances where applicable, piston and liner condition, and crankcase leaks.
- Model-specific measurement: use a documented test or compare with a known healthy example using the same equipment and conditions.
Four-stroke engines add valve timing and clearance to the diagnosis. The Saito four-stroke gasoline-engine manual provides model-family instructions for valve clearance, fuel, ignition and starting. Tight valves can reduce sealing when hot; incorrect cam timing after assembly can provide compression at the wrong point or disrupt gas exchange. Do not change clearances without the exact specification.
Step 6: restore the documented starting baseline
Only after rotation, fuel, ignition and mechanical condition pass should you restore the carburetor baseline. Gently close a needle only as the manual instructs; forcing it against the seat can damage the metering surfaces. Then open it to the documented starting position. Set throttle opening, choke or primer and starting direction exactly as specified.
The companion model-engine carburetor tuning guide begins where this no-start workflow ends. It explains rich-versus-lean evidence and a controlled high-speed/low-speed sequence for an engine that can already run. Tuning cannot repair a blocked line, failed plug, air leak or incorrect timing.
A ten-minute system-first workflow
- Stop and make safe. Ignition off, fuel controlled, rotating area clear, engine secured.
- Name the failure state. No rotation, no firing, brief firing, igniter-dependent, hot-only or post-storage.
- Verify identity. Exact engine, correct manual revision, fuel, plug, ignition and starting method.
- Check rotation. Clear flooding only by the manual; isolate external drivetrain load where possible.
- Inspect fuel path. Fresh correct fuel, pickup, tubing, vent, pressure line, filter and leak-free intake.
- Test ignition. Correct glow plug and charged igniter, or safe spark-system verification and timing reference.
- Assess compression and events. Seals, plug, head, valves and timing using model-specific limits.
- Restore factory baseline. Needles, idle opening, choke or primer and startup direction.
- Attempt one controlled start. Follow the manual, observe whether the state changes, then stop and record it.
- Escalate intelligently. If the same state remains, test the next hypothesis; if mechanical evidence is abnormal, obtain service help.
This sequence is faster than random adjustment because every test has a decision attached to it.
Symptom-to-test decision table
| Symptom | Leading hypotheses | Discriminating test | Next action |
|---|---|---|---|
| Wet plug and no firing | Flooding, weak ignition, overly rich baseline | Clear by manual, verify plug/igniter, restart at baseline | Repair ignition before mixture changes |
| Dry plug and no firing | No fuel delivery, blocked passage, inadequate priming | Trace fuel to carburetor and confirm pickup/vent | Restore supply; do not over-prime |
| Fires only when primed | Fuel not continuing, lean baseline, tank or pressure fault | Observe flow and vent/pressure plumbing | Repair supply, then reset baseline |
| Fires backward or kicks back | Wrong starter direction, excess prime, ignition timing error | Check manual direction and timing reference | Stop until direction/timing is confirmed |
| Starts then sags as tank empties | Blocked vent, pickup position, pressure leak | Inspect tank system under the same orientation | Repair tank plumbing |
| Cold start works, hot restart fails | Mixture drift, plug, compression or heat-related fuel issue | Compare plug, fuel flow and compression cold versus hot | Use the manual’s hot-start procedure |
What to inspect after storage
Storage changes the system even if no adjustment was touched. Fuel can absorb contamination or leave deposits; tubing can harden; oil can gum narrow passages; bare steel can corrode; and a four-stroke valve may stick. Discard questionable fuel according to local rules and the manufacturer’s instructions. Do not run old fuel merely to avoid waste.
Turn the engine only by the documented method. If it resists, do not add leverage. Inspect the plug, cylinder, carburetor, valves and bearings as appropriate, then use the specified after-run or preservation process for future storage. Accessories must be matched to the engine: the starting and ignition category and mount, fuel and exhaust category are useful browsing paths, not automatic compatibility claims.
Applying the framework to different EnginesDIY models
The framework remains stable while the details change. A compact VRX VX18 two-stroke nitro engine uses glow ignition and vehicle-oriented fuel plumbing. The TOYAN FS-L200AC inline-twin nitro kit adds multi-cylinder mechanical and synchronization considerations. The SEMTO ST-NF2 twin-cylinder nitro model has its own installation chain. An L100 single-cylinder gasoline model uses a different fuel and ignition architecture.
These examples demonstrate why one internet needle setting cannot solve every no-start. Confirm the listing, supplied documentation and actual delivered configuration before ordering fuel, plug or ignition parts. If a specification is missing or inconsistent, ask for clarification rather than infer compatibility.
Safety boundaries
Operate combustion engines outdoors. CDC/NIOSH warns in Preventing Carbon Monoxide Poisoning from Small Gasoline-Powered Engines and Tools that carbon monoxide can accumulate in enclosed or partly enclosed spaces. A garage door, window or fan does not make indoor operation safe.
Fuel vapour and hot components create a fire risk. OSHA’s flammable-liquids standard is a workplace regulation, not a hobby instruction sheet, but its controls explain the hazards: suitable containers, ventilation, spill control and separation from ignition sources. Follow local requirements and the fuel manufacturer’s safety data.
Use a secure mount, eye protection and a protected starting position. Keep hands, clothing, tools, leads and spectators outside the rotating plane. Stop immediately for fuel leaks, abnormal vibration, loose hardware, damaged propellers or couplers, metallic noise, rising heat or uncertain ignition timing.
Frequently asked questions
Why will my model engine turn over but not start?
The engine may lack fuel at the carburetor, usable glow or spark ignition, adequate compression, correct timing, or a valid starting baseline. Test those systems separately instead of turning multiple needles.
How do I know if a glow engine is flooded?
A flooded engine may become unusually hard to rotate and can produce a wet plug. Stop the starter and use the exact manual’s clearing procedure. Do not force the piston against trapped liquid.
Why does the engine fire only when I prime it?
Priming provides a temporary charge. If the engine fires and immediately stops, continued fuel delivery may be absent because of the pickup, vent, pressure line, tubing, carburetor passage or an excessively lean starting baseline.
Why does my glow engine stop when I remove the igniter?
Possible causes include a damaged or unsuitable glow plug, weak combustion heat, a very rich mixture, low idle speed, unsuitable fuel, insufficient warm-up or poor compression. Test the plug and documented baseline before tuning.
Should I change carburetor settings when an engine will not start?
First restore the documented factory starting setting. Do not tune further until rotation, fuel delivery, ignition, compression and timing pass. Carburetor adjustment cannot repair faults in those systems.
Bottom line
The fastest reliable no-start diagnosis begins with a precise observation. Separate inability to rotate from inability to fire, and separate a brief fire from sustained running. Then move through fuel, ignition, compression and timing with the exact manual, one controlled test at a time. When the engine runs reliably at its safe baseline, carburetor refinement can begin. Until then, random adjustment only hides evidence.
References
- O.S. Engines — 11AX instruction manual
- O.S. Engines — Speed B2103 Type R instruction manual
- Zenoah / Horizon Hobby — G26 gasoline engine manual
- Saito / Horizon Hobby — four-stroke gasoline-engine manual
- Federal Aviation Administration — Pilot’s Handbook, Chapter 7
- CDC/NIOSH — Preventing Carbon Monoxide Poisoning from Small Gasoline-Powered Engines and Tools
- Occupational Safety and Health Administration — Flammable liquids
Model Engine Troubleshooting Path
Start with the symptom and test one system at a time before changing several settings. Use the guide that matches the first failed check:
- Compression test and leak-down diagnosis for weak compression or suspected leakage.
- Overheating and cooling diagnosis for rising temperature or inadequate airflow or coolant flow.
- Ignition timing and BTDC setup for spark-timing checks on applicable engines.
- Lubrication and oiling-point diagnosis for friction, wear or uncertain oil requirements.
- Fuel-system diagnosis for tank, clunk, vent and fuel-starvation symptoms.
- Glow-plug diagnosis for heat-range, fuel-match and element failures.
- Vibration diagnosis for propeller balance, mounts, runout and bearing clues.
After identifying the operating system and repair limits, compare the available model engine kits by operating method, assembly level and intended use.
Leave a comment