


Quick answer: If a nitro RC engine suddenly becomes very hard or impossible to turn after priming, stop the starter immediately. Do not pull harder, hold an electric starter on, or assume the engine has seized. Disable ignition, keep dirt away from the head, remove the glow plug and sealing washer by the exact model's procedure, point the plug opening safely away from faces and ignition sources, and turn the engine only as the manufacturer allows to expel excess liquid. Refit a verified plug and washer, then attempt the next start without priming again. If resistance remains with the plug removed, stop: the problem is not simply combustion-chamber flooding.
Key takeaways: a liquid-filled combustion chamber cannot compress like the normal fuel-air charge; starter resistance is the warning, not a challenge; normal cold pinch near top dead center, a jammed drivetrain and internal seizure require different responses; the plug opening can eject fuel at speed; and clearing the chamber is incomplete until the cause of over-fueling is found. A flooded nitro engine must be unloaded before it is restarted: stop forcing the starter, remove ignition power, vent the chamber by the model-specific method, and identify why liquid accumulated.
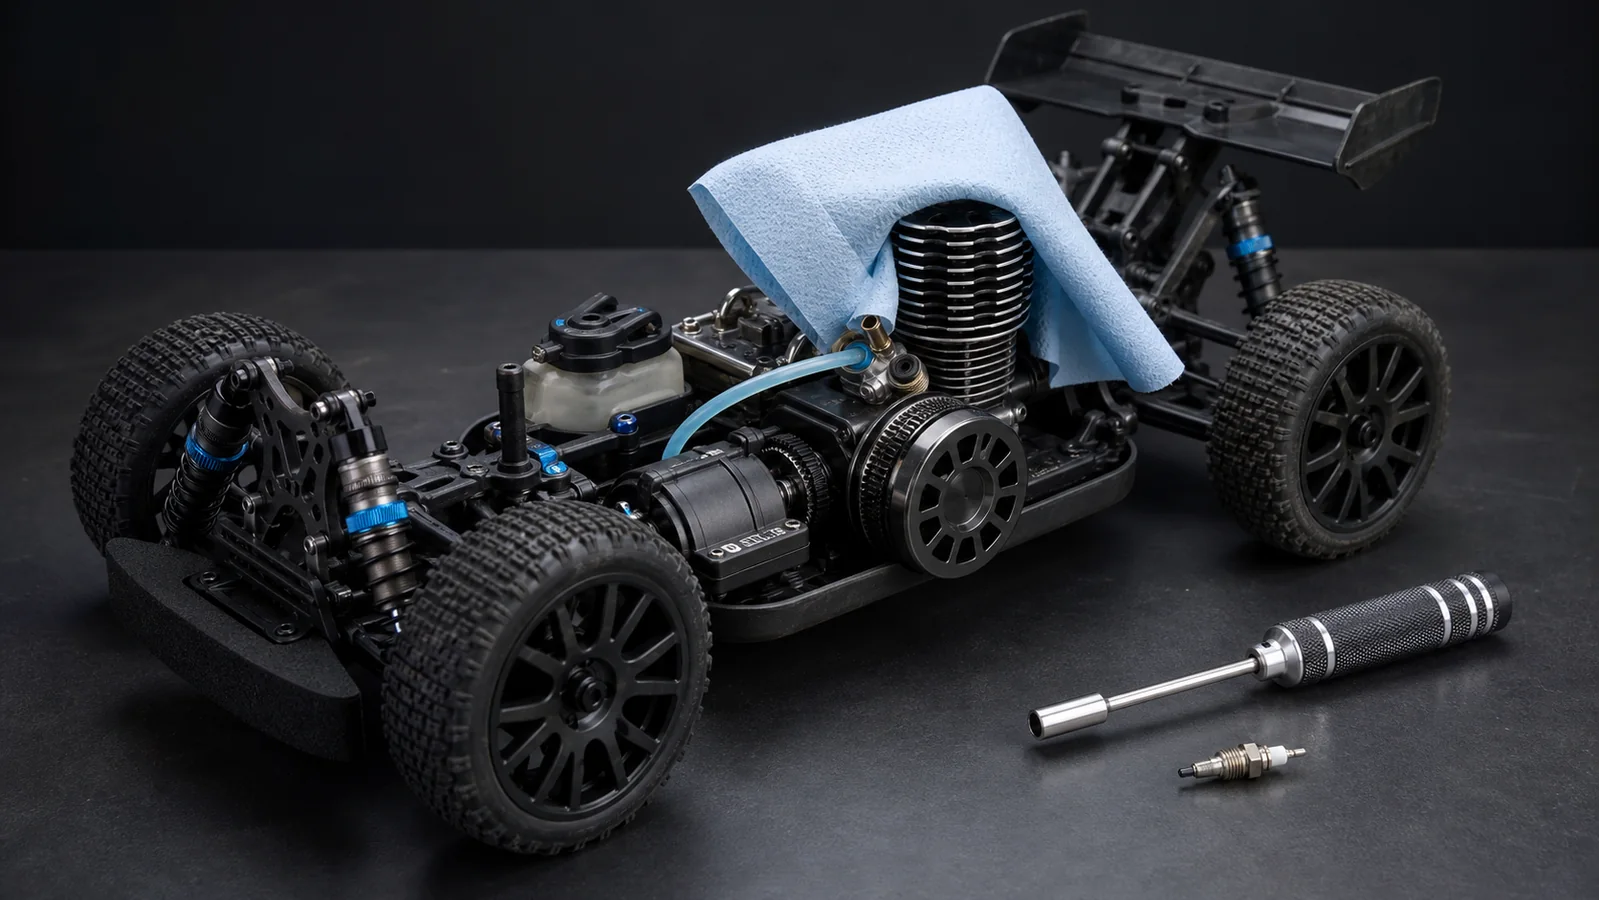
Reviewed: August 28, 2026. This guide synthesizes manufacturer procedures from Traxxas, HPI Racing, Team Associated, ECX/Horizon Hobby and LRP. Always give the exact vehicle and engine manual priority.
What does a flooded or hydraulically locked nitro RC engine mean?
A glow engine needs a finely metered mixture of air and fuel vapor. During priming, liquid fuel is moved from the tank toward the carburetor so the engine has something to ignite. If too much liquid reaches the crankcase and combustion chamber before the engine fires, the engine is flooded. The result can range from wet, muffled attempts to fire to a crankshaft that will not complete its normal rotation.
The severe form is commonly called hydraulic lock or hydro-lock. Liquid occupies volume but is effectively incompressible in this application. As the piston rises, the trapped liquid can stop it before top dead center. The starter system then becomes the path through which the operator applies force. A pull cord, starter gear, one-way bearing, connecting rod or other part may be damaged before the liquid moves. The correct response is therefore to remove the load, not increase starter torque.
Recent demand is not theoretical. An August 6, 2026 owner report in the RC community described a nitro engine filling its muffler with liquid fuel and a starter gear drive being destroyed; the discussion centered on extreme over-fueling and possible hydraulic lock. Community reports identify the real language and failure context, but the procedure below follows manufacturer documentation rather than treating comments as specifications.
How can you recognize flooding without confusing it with another fault?
Traxxas describes a flooded engine as one that was primed too long and will no longer turn because excess fuel prevents upward piston movement. Team Associated lists difficulty starting, muffled exhaust sounds, a starter rope that will not pull and excess fuel draining from the exhaust. These clues are useful together; no single clue proves the diagnosis.
| Observation | Flooding is plausible when | Do not assume flooding when |
|---|---|---|
| Starter suddenly stops or becomes very hard | It changed immediately after priming or repeated start attempts | It was already rough, gritty or locked before fuel was added |
| Wet exhaust or fuel ejection | Liquid appears after prolonged priming and the engine has not fired | Normal rich exhaust oil appears only after a running break-in cycle |
| Resistance near top dead center | The plug removal releases liquid and restores smooth rotation | A new ABC/ABN engine has repeatable cold pinch but no excess liquid |
| Electric starter slows | The engine itself is loaded and the battery was previously healthy | The starter battery, wiring, motor or one-way bearing is faulty |
| Engine turns but will not fire | The plug is wet and exhaust sounds are dull after over-priming | Fuel never reached the carburetor, glow power is absent, or compression is low |
Flooding versus normal new-engine pinch
Many model engines use a tapered sleeve and are intentionally tight near top dead center when cold, especially during break-in. Traxxas documents a separate procedure for a piston stuck at top dead center and warns that too much oil can itself hydro-lock the engine. A repeatable tight point in a new, correctly lubricated engine is not the same as a crankshaft that abruptly stops after fuel enters. Do not force either condition. Warm or release a tight new engine only as its manual instructs.
Flooding versus a seized engine or jammed drivetrain
If the engine remains locked, gritty or notchy with the glow plug removed, liquid in the chamber is no longer an adequate explanation. The clutch bell, starter path, one-way bearing or internal engine may be mechanically jammed. Use the starter-system torque-path guide and the exact exploded view before applying more force. Metal debris, heat discoloration, bearing roughness or a rod that will not move requires inspection or qualified service.
What should you do the moment the starter loads up?
- Release the starter immediately. Do not complete one more hard pull or hold a roto-start button to see whether it breaks free.
- Close the fuel source and stop priming. Remove pressure from the exhaust and return the throttle to the manual's safe position.
- Make ignition impossible. Disconnect the glow igniter or glow-plug lead before placing tools near the head.
- Stabilize the vehicle. Switch off radio power in the maker's order, keep wheels off controls, and work away from flames, sparks and hot exhaust parts.
- Read the exact procedure. A Traxxas EZ-Start sequence is not automatically correct for an HPI Roto Start, pull-start engine, starter box or aircraft engine.
The decision point is simple: resistance that rises abruptly after priming is a stop signal. HPI warns that its Roto Start can damage the engine and starter if used continuously for more than five seconds. That limit is product-specific, but the general principle is universal: starter duration and force are not diagnostic tools.
A safe flooded nitro RC engine clearing workflow
The steps below describe the common logic shared by several manufacturer manuals. Where a model manual differs, use that manual.
1. Prepare the work area and protect the engine
Move outdoors or to strong ventilation. Keep smoking materials, flames, heaters, sparks and hot tools away. Wear eye protection and fuel-resistant gloves appropriate to the fuel safety data sheet. Let the exhaust cool. Clean loose dirt from around the cooling head so nothing falls through the plug opening. Have an absorbent cloth ready, but do not pack material into the engine.
2. Remove glow power, then remove the plug and washer
Disconnect the glow lead or igniter. Use the correct plug wrench or nut driver and retain the copper sealing washer. Do not remove the cooling head merely to clear ordinary flooding. Inspect the plug for a deformed element, debris or a missing washer, but do not energize it beside spilled fuel.
3. Aim the ejection path safely
Manufacturer procedures commonly invert or tilt the model so the plug opening faces away from the operator. Traxxas explicitly warns not to look into the opening while the engine spins because fuel can spray into the face. Keep bystanders away. Position the cloth to catch expelled liquid without being pulled into gears, the flywheel or starter.
4. Turn the engine only by its approved method
With the plug out and ignition disabled, turn the engine through a small number of controlled cycles using the exact manual's method. Team Associated instructs owners to invert the car and pull the starter a couple of times. HPI describes using the Roto Start briefly with the head pointed away. An ECX/Horizon manual specifies two or three recoil pulls with the cylinder head pointing down. Stop when bulk liquid no longer exits and normal mechanical movement returns; endless cranking is not cleaning.
5. Stop if rotation is still abnormal
With compression relieved, the engine should turn by the approved method without the same liquid stop. Persistent locking, a tight point outside normal cold pinch, grinding, a loose flywheel or an engine that will not complete a cycle indicates a mechanical fault. Do not reinstall the plug and retry. Separate the engine from the starter and drivetrain only if the service manual permits, or obtain qualified inspection.
6. Refit the correct plug and sealing washer
Use the specified plug type and confirm the washer is present. Start threads by hand where the manual allows and tighten only to the documented requirement. Cross-threading or overtightening an aluminum head creates a new leak and repair. If the filament was distorted, contaminated or failed, replace the plug with the manufacturer-approved type.
7. Do not prime again
Traxxas and HPI both instruct the next attempt without re-priming after clearing. Use the documented throttle opening and starter cycle for the exact vehicle. If the engine does not show a normal attempt to fire, stop and diagnose fuel delivery, glow power and baseline settings rather than repeating the flood-clear-flood cycle.
How do pull-start, roto-start and starter-box systems change the procedure?
Pull-start engines
A hard pull cord is easy to misread as permission to pull faster. It is the opposite. Do not wrap the handle around fingers, pull beyond the manual's extension limit or use the cord to force the piston through liquid. Once the plug is removed and the model is safely oriented, use only the short controlled pulls specified by the manufacturer. Inspect the recoil and one-way bearing if the cord fails to retract or slips after the chamber is clear.
Roto-start and onboard electric starters
Electric torque can conceal the operator's feel until a gear, shaft or motor is overloaded. Release the button at the first abnormal slowdown. Follow the maker's duty-cycle limit and wiring sequence. The Traxxas EZ-Start support procedure includes product-specific steps involving its glow circuit and motor wiring; do not copy those steps to another starter architecture.
Starter-box engines
A starter box drives the flywheel from below. If the wheel stalls or the engine refuses to pass top dead center after priming, lift the car off immediately. Continued pressure can glaze the starter wheel, overheat the box motor or apply high load to the engine. Remove the glow plug and clear by the engine manufacturer's method before returning the chassis to the box.
Why did the engine fill with liquid fuel?
Clearing treats the immediate load. Prevention requires finding why liquid accumulated.
- Over-priming: holding a finger over the exhaust too long, repeatedly operating a primer bulb, or continuing to crank after fuel visibly reaches the carburetor.
- Needles far too rich: incorrect baseline settings can deliver more fuel than the engine can burn. Return only to the exact documented baseline; do not copy turn counts from another carburetor.
- Blocked intake or exhaust: Team Associated lists blocked exhaust and air cleaner faults in the same troubleshooting context. Inspect the air filter, outlet and pressure plumbing.
- Repeated failed starts: a dead glow plug or weak igniter allows fuel to accumulate with every attempt. Verify glow power before adding more fuel.
- Incorrect throttle or linkage: a closed or mis-set carburetor can prevent the correct starting airflow. Check neutral, idle gap and endpoints with the engine unable to start.
- Fuel path faults: pinched, reversed or leaking pressure and feed lines can produce inconsistent priming that encourages the operator to overcorrect.
Use the tank, clunk and pressure-line guide to verify plumbing, the air-filter maintenance guide for intake restriction, and the glow-plug troubleshooting guide before changing mixture settings. If a rich baseline or throttle position is suspect, follow the carburetor tuning sequence only after the engine starts and reaches the conditions required by its manual.
What should pass before the post-clear restart?
- Mechanical freedom: normal rotation has returned with the plug removed; no grinding, repeated lock or starter slip remains.
- Correct ignition: the specified plug, washer and charged igniter or onboard glow circuit are verified away from spilled fuel. For a documented replacement, browse compatible engine starting and ignition accessories.
- Known fuel: the fuel is fresh, labeled and approved for the engine. Use the old-fuel screening guide when storage history is uncertain.
- Open flow paths: air filter, exhaust outlet, pressure line and feed line are correctly installed and unobstructed.
- Safe radio state: throttle neutral, brake, servo direction, receiver power and fail-safe are checked with the engine stopped.
- Documented baseline: needles and idle opening match the exact engine manual, not a forum setting or another model.
- No additional prime: make one controlled attempt using the manufacturer sequence. Stop if abnormal resistance returns.
If the engine turns normally but still does not fire, use the model-engine no-start decision tree. If resistance returns repeatedly, inspect the fuel-metering path and starter before another attempt. If a used vehicle's history is unknown, complete the used nitro RC inspection checklist rather than assuming flooding is the only problem.
Evidence limits and safety
This guide cannot diagnose bent connecting rods, damaged starter gears, failed bearings or piston-and-sleeve condition remotely. It also cannot supply one universal number of pulls, seconds of starter use, throttle opening or needle turns. Those details vary by engine and starter. The manual for the exact engine, car and starting system is the controlling source.
Nitro glow fuel commonly contains methanol, nitromethane and lubricants. It is flammable and toxic. Avoid inhalation, ingestion, skin and eye contact; keep it in its labeled container; and follow the product safety data sheet and local disposal rules. Do not use compressed air into a fuel tank, blow through fuel tubing by mouth, or energize a glow plug around spilled fuel.
Keep the vehicle restrained as the manual directs and keep hands, clothing, towels and tools clear of the flywheel, clutch, gears, wheels and starter. Hot exhaust components can burn after the engine stops. If fuel enters eyes or is swallowed, follow the product's emergency instructions and contact local emergency or poison-control services.
Frequently asked questions
Can I clear a flooded nitro engine without removing the glow plug?
Do not improvise. Major RC manufacturers commonly specify removing the glow plug so excess liquid can leave and compression load is relieved. A product-specific glow-heating step may appear in one starter system's manual, but it is not a universal substitute for clearing the chamber.
Will a flooded nitro engine damage itself?
Flooding alone does not prove damage, but forcing a liquid-locked engine can overload the starter gears, one-way bearing, connecting rod and other parts. Stop immediately, clear it correctly and verify smooth rotation before restarting.
How many pulls should I use after removing the glow plug?
Use the exact manual. Team Associated describes a couple of pulls, while an ECX/Horizon manual specifies two to three. Different starter systems have different duty limits. The goal is to expel bulk liquid and restore normal movement, not to keep cranking.
Why does my new nitro engine feel stuck at top dead center?
A new tapered-sleeve engine may have strong cold pinch near top dead center. That is different from an abrupt stop after priming. Do not force it. Follow the engine maker's break-in, preheating or top-dead-center release procedure.
Should I replace the glow plug after flooding?
Inspect and test it by the manufacturer procedure. Replace it if the filament is failed, deformed, contaminated or the plug is the wrong specification. Always retain or replace the correct sealing washer and avoid cross-threading.
What if the engine is still locked with the glow plug removed?
Stop. Combustion-chamber liquid is no longer a sufficient explanation. Check the starter path, clutch and drivetrain as the manual permits, and arrange internal inspection if the crankshaft remains rough, notchy or immovable.
How do I prevent flooding on the next start?
Prime only until fuel reaches the documented point, then stop. Use a working glow system, correct throttle opening, unobstructed air and exhaust paths, sound fuel lines and the exact carburetor baseline. Do not compensate for a no-start fault by repeatedly adding fuel.
Conclusion
A flooded nitro RC engine is a load-control problem before it is a tuning problem. The safest sequence is to recognize the sudden change in resistance, release the starter, disable glow power, vent excess liquid through the plug opening by the model-specific method, and stop if normal rotation does not return. Only then should you verify fuel, glow, airflow, plumbing and baseline settings for one controlled restart without additional priming. That discipline protects the starter and engine while turning a vague “locked” symptom into a clear diagnostic branch.
References
- Hobbico / Helion - Starfire 40 Glow Engine Manual and Flooding Troubleshooting
- Traxxas - Slayer Pro 4X4 Owner's Manual, Clearing a Flooded Engine
- Team Associated - Nitro TC3 RTR Quick Start Guide
- HPI Racing - Nitro 3 Evo Instruction Manual, Flooded Engine Procedure
- HPI Racing - Nitro 3 Evo+ Manual, Roto Start Duty and Flooding
- ECX / Horizon Hobby - Nitro Vehicle Instruction Manual
- LRP - Nitro Engine Manual and Troubleshooting Guide
- Recent owner case - possible hydraulic lock and starter gear damage, August 6, 2026
Leave a comment